What Is Portrait Photography? Beginner Tips to Start Strong!
Discover what portrait photography is and how to turn your passion into profit! From mastering natural light to building a portfolio and defining your niche, this guide is packed with beginner-friendly tips to help you create stunning portraits and grow your photography business. Start your journey today!
So, you’ve picked up a camera, started snapping portraits, and maybe even launched your photography business—congrats! 🎉 But now you’re wondering, “What is portrait photography? And how do I take my work from ‘meh’ to ‘WOW’?” Don’t worry; this guide is here to help you master the basics, avoid common pitfalls, and start creating portraits that make your clients say, “This is amazing!”
What Is Portrait Photography? Let’s Start Simple
What is portrait photography? At its core, it’s about capturing a person’s essence—their personality, emotions, and story—through a photograph. It’s not just about taking a picture of someone’s face; it’s about creating a connection between the subject and the viewer.
Think of it like this:
A snapshot says, “This is what they look like.”
A portrait says, “This is who they are.”
Whether you’re shooting headshots, family portraits, or creative concepts, portrait photography is your chance to tell a story with your camera.

The art of portraiture showcases how portrait photography captures personality, emotions, and storytelling while building a connection between the subject and the viewer.
Why Portrait Photography Is Perfect for Beginners
Here’s the good news: Portrait photography is one of the most accessible genres for beginners. Why?
You don’t need fancy gear: A basic camera (or even a smartphone) and natural light can work wonders.
It’s all about people: If you enjoy connecting with others, you’re already halfway there.
Endless creativity: From posed studio shots to candid outdoor moments, there’s no limit to what you can create.
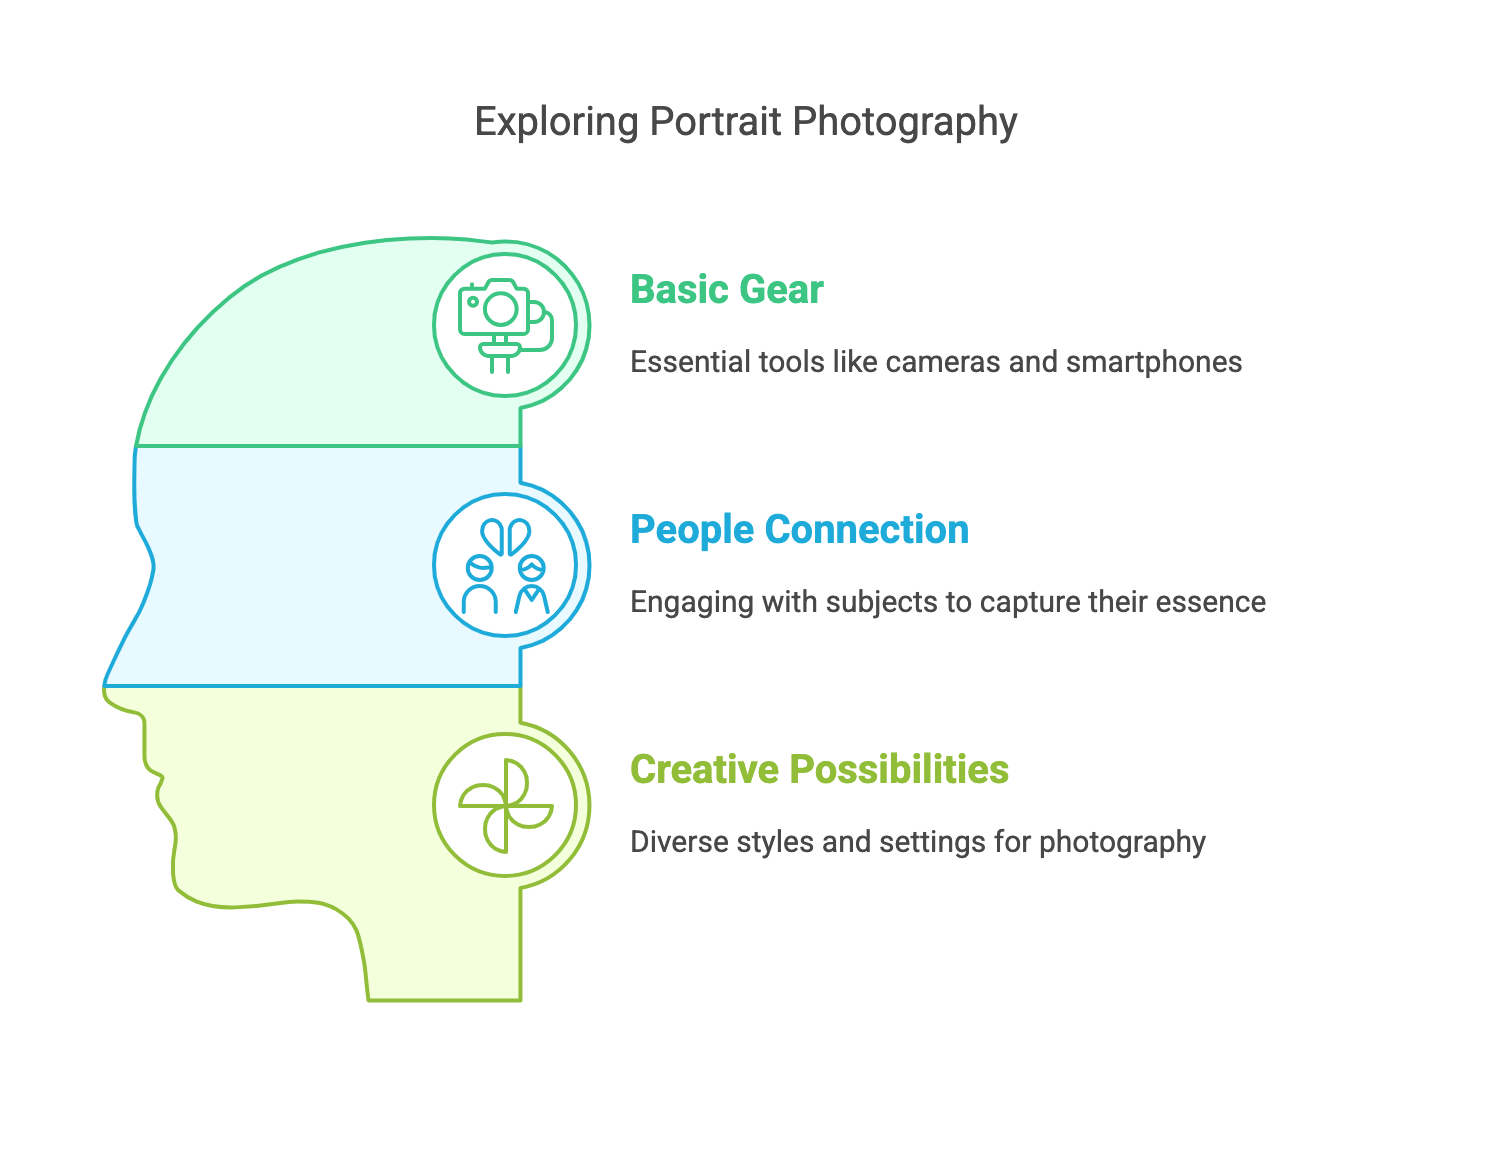
An illustration exploring portrait photography, highlighting basic gear like cameras and smartphones, the importance of connecting with subjects to capture their essence, and the creative possibilities of diverse styles and settings.
Types of Portrait Photography to Explore
As a beginner, it’s helpful to understand the different styles of portrait photography so you can find your niche:
Traditional Portraits
Think: Classic headshots or family photos.
Perfect for: Building your portfolio and working with clients who want timeless images.
Environmental Portraits
Think: A baker in their kitchen or a musician with their guitar.
Perfect for: Adding context and storytelling to your work.
Candid Portraits
Think: Laughing kids, a couple sharing a quiet moment.
Perfect for: Capturing raw, authentic emotions.
Lifestyle Portraits
Think: People in everyday settings, like a family picnic or a coffee shop.
Perfect for: Clients who want natural, unposed images.
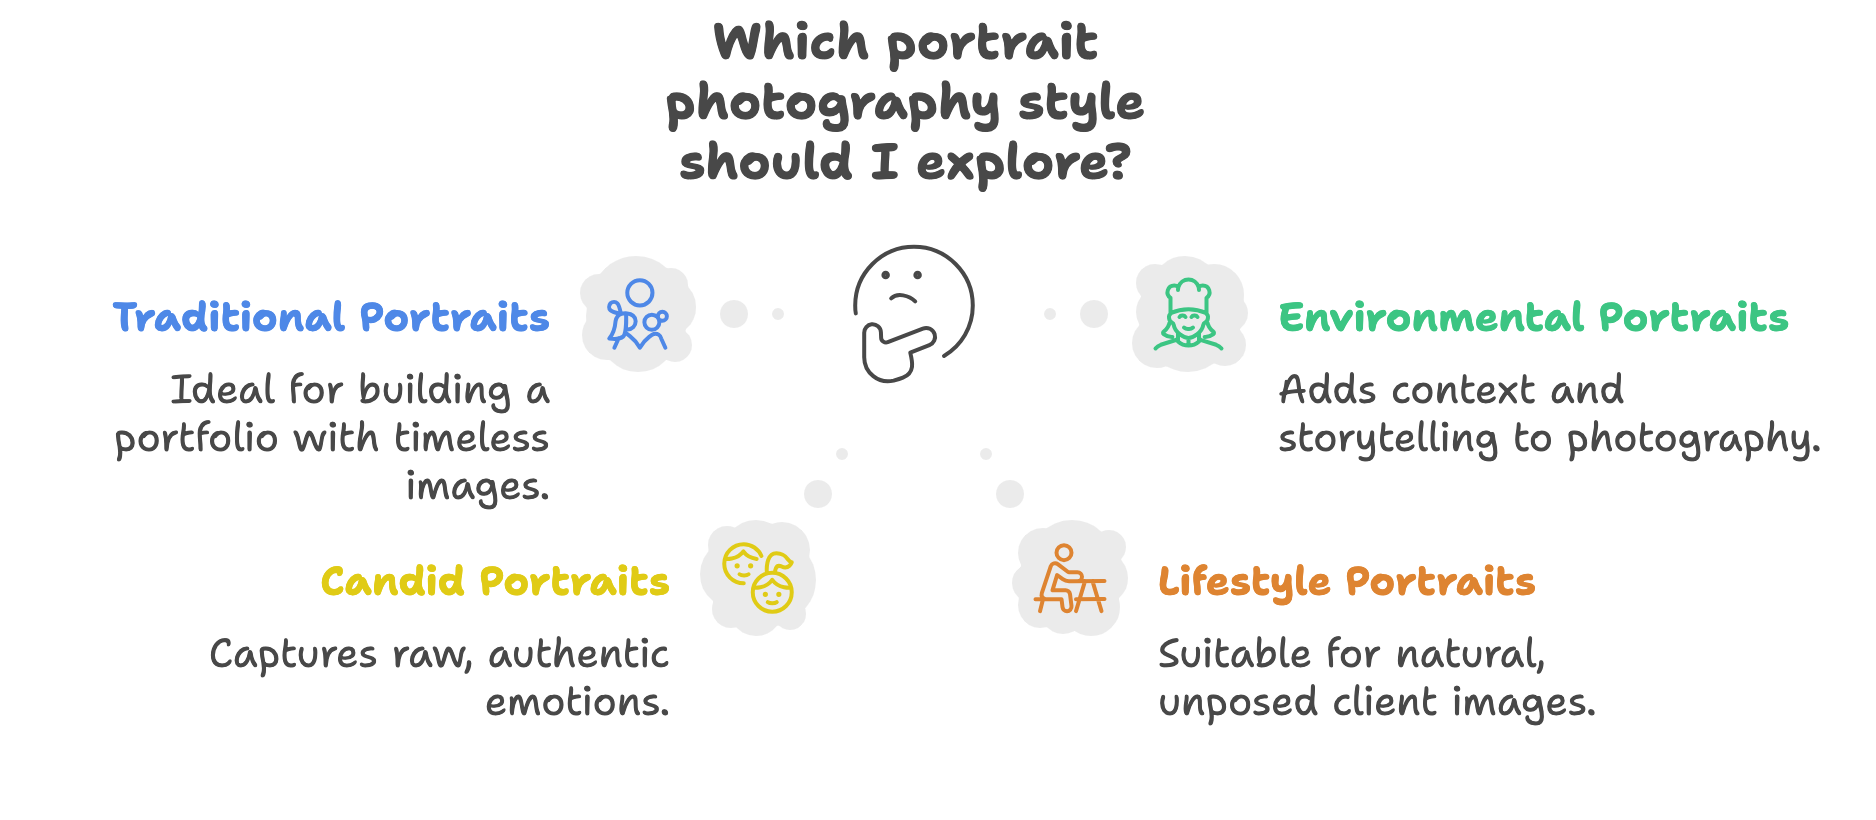
This infographic helps explore different portrait photography styles: traditional portraits for timeless images, environmental portraits for storytelling, candid portraits for authentic emotions, and lifestyle portraits for natural, unposed client photos.
Pro Tip: Start with traditional and lifestyle portraits—they’re beginner-friendly and in high demand!
Essential Gear for Beginner Portrait Photographers
You don’t need to break the bank to get started. Here’s what you’ll need:
1. Camera
DSLR or Mirrorless: A Canon Rebel or Sony Alpha series is a great starting point.
Smartphone: Modern phones have portrait modes that can produce surprisingly good results.
2. Lenses
50mm f/1.8: Affordable, versatile, and perfect for creamy backgrounds.
Kit Lens (18-55mm): Great for experimenting with different focal lengths.
3. Lighting
Natural Light: Shoot near a window or outdoors during golden hour (just after sunrise or before sunset).
Reflector: A $20 reflector can bounce light onto your subject for a professional look.
4. Accessories
Tripod: Helps you stay steady and consistent.
Memory Cards and Extra Batteries: Trust me, you’ll need them!

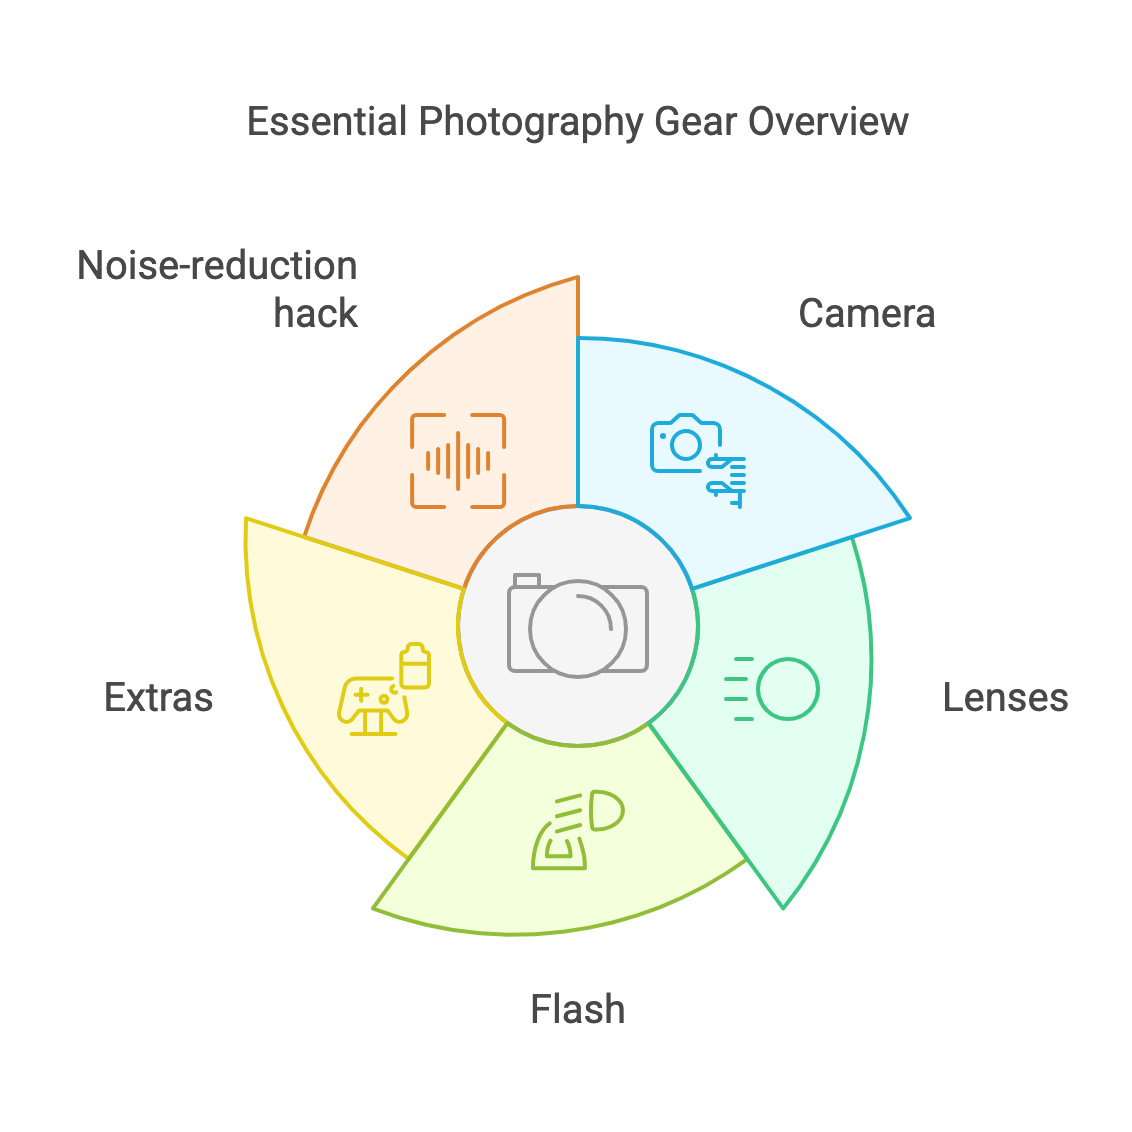
Showcasing essential photography equipment for beginners, including DSLR or mirrorless cameras, a 50mm lens for depth of field, natural light for beautiful results, reflectors for enhancing lighting, and tripods for stability in low light or long exposures.
5 Beginner-Friendly Tips for Stunning Portraits
Master Natural Light
Position your subject facing a window for soft, flattering light.
Avoid harsh midday sun—shoot in the shade or during golden hour.
Focus on the Eyes
The eyes are the window to the soul. Make sure they’re sharp and well-lit.
Keep the Background Simple
Avoid clutter. Use a plain wall or blur the background with a wide aperture (f/2.8 or lower).
Pose with Purpose
Start with basic poses: “Chin down, eyes up” or “Shift your weight to one foot.”
Use prompts like, “Tell me about your favorite vacation,” to capture natural expressions.
Edit Like a Pro (Even as a Beginner)
Use free tools like Snapseed or Canva for basic edits.
Adjust exposure, contrast, and warmth to make your portraits pop.

Tips for stunning portrait photography, including mastering natural light through window positioning and avoiding harsh sun, focusing on sharpness in the eyes, posing with purpose using basic poses and expression prompts, simplifying backgrounds with plain walls or wide apertures, and editing like a pro with tools like Snapseed…
Common Beginner Mistakes (and How to Fix Them)
Every beginner makes mistakes, but the key is learning from them! One common issue is :
flat, boring lighting: which can be fixed by using a reflector or shooting during golden hour for soft, flattering light.
stiff, awkward poses—combat this by giving your subject clear, fun prompts like, “Tell me about your favorite vacation,” to help them relax and express themselves naturally.
Distracting backgrounds can ruin an otherwise great shot, so use a wide aperture (like f/2.8 or lower) to blur the background and keep the focus on your subject.
over-editing by keeping your retouching subtle and natural; remember, less is often more!

Tips on how to fix common portrait photography mistakes, such as using a reflector or golden hour to avoid flat lighting, giving fun prompts to fix awkward poses, using a wide aperture to blur distracting backgrounds, and minimizing edits to avoid over-editing and maintaining a natural look
How to Start Your Portrait Photography Business
If you’re ready to turn your passion into profit, here’s how to get started:
Build a Portfolio
Offer free or discounted sessions to friends and family to build your portfolio.
Define Your Niche
Focus on what you love: families, couples, headshots, etc.
Create a Simple Website or Social Media Page
Showcase your best work and make it easy for clients to contact you.
Price Your Services Competitively
Research local photographers and set beginner-friendly rates.
Deliver a Great Client Experience
Communicate clearly, be professional, and deliver on time.

Important steps to turn photography passion into a successful business include building a portfolio by offering free or discounted sessions, defining a niche like families or headshots, creating an online presence with a website or social media, pricing services competitively, and delivering a great client experience through clear communication and professionalism
Frequently Asked Questions
Q: Do I need a professional camera to start?
A: Not at all! Start with what you have (even a smartphone) and upgrade as you grow.
Q: How do I make my clients feel comfortable?
A: Chat with them before shooting, give clear directions, and keep the mood light.
Q: What’s the best way to learn portrait photography?
A: Practice daily, watch tutorials, and analyze portraits you admire.
Conclusion: Your Portrait Journey Starts Now!
What is portrait photography? It’s your chance to create art, connect with people, and build a business you love. Remember, every pro started as a beginner—so don’t be afraid to make mistakes and learn as you go.
Your Next Step: Grab your camera, find a friend to practice with, and start shooting. Share your progress online, and don’t forget to tag #PortraitBeginner—we’d love to cheer you on!
Top 5 Tips & Tricks to Master Event Photography
Mastering event photography means capturing every moment with precision. From choosing the right gear to perfecting composition, these expert tips will elevate your skills
Introduction:
Imagine capturing the moment the bride’s laughter lights up the room or the CEO’s handshake that seals a deal—event photography immortalizes these fleeting memories. But how do you ensure you never miss a shot? Whether navigating your first gig or refining your craft, mastering event photography takes skill, patience, and the right tools. In this article, we’ll walk you through 10 crucial tips that will elevate your photography game.
Key Takeaways:
Master Your Camera Settings: Understand when to shoot in RAW vs. JPEG and how to optimize settings for diverse event conditions.
Use Burst Mode: Perfect for fast-paced action and fleeting moments—burst mode ensures you capture that perfect shot.
Choose the Right Gear: Lenses like the 24-70mm f/2.8 and flashes like the Godox V1 can make all the difference in quality and versatility.
Composition is Key: Understand the rule of thirds, group shot techniques, and more to create balanced and dynamic photos.
Be Prepared for Challenges: From low-light to high-energy moments, each situation requires a different strategy.
Content Table:
Camera Settings: RAW vs. JPEG
The Right Gear: Lenses and Flash Recommendations
Composition and Framing
Challenges Encountered and Solutions Provided
Post-Processing Tips
Q&A: Practical Tips
Conclusion & Call to Action
1. Camera Settings: RAW vs. JPEG
The choice between RAW and JPEG formats is crucial in event photography. While JPEG is more convenient for quick uploads and sharing, RAW files offer greater flexibility for post-processing.
Why RAW?
RAW files retain 12-14 bits of data per channel, which allows drastic exposure adjustments without compromising image quality. This means if you make a mistake with exposure during a shoot (a common event photography challenge), you can fix it later without losing image detail.
When to Use JPEG:
JPEG can be useful for quick turnarounds, where file size matters more than post-production flexibility. If you’re shooting in a controlled setting, JPEG is perfectly fine. But if you're capturing fast-moving action at a wedding or event, RAW is your best friend.

Comparing RAW and JPEG formats for event photography. RAW offers flexibility for post-processing and retains image quality, making it ideal for correcting exposure mistakes. JPEG is suitable for quick uploads and sharing, especially in settings where file size is a concern
2. The Right Gear: Lenses and Flash Recommendations
Having the right gear can make all the difference during an event. Here’s a breakdown of the essential gear options I personally use to elevate my photography:
Lenses
Canon RF 24-70mm f/2.8 A versatile zoom lens ideal for wide-angle shots and portraits, especially in tight spaces.
Canon RF 70-200mm f/2.8 Perfect for capturing candid moments from a distance without disrupting the scene.
Flash
Bounce Flash: A Godox V1 paired with a diffuser softens harsh indoor lighting, ensuring natural skin tones and avoiding the dreaded “red-eye” effect.
Stabilization
Monopod or Tripod: Essential for maintaining sharpness in low-light conditions or during long events. A monopod offers mobility, while a tripod provides maximum stability for static shots.

Showcasing essential photography gear to enhance skills, including the Canon RF 24-70mm lens for wide-angle and portrait shots in tight spaces, the Canon RF 70-200mm lens for capturing distant candid moments, the Godox V1 flash for softening indoor lighting and achieving natural skin tones, and a monopod or tripod for stability during low-light or long-event shooting.
3. Composition and Framing
Composition is a key element of any great photograph. In event photography, you often have little control over your environment, so you must make the most of the scene.
Rule of Thirds: Place a subject’s face (or eyes) along the top third gridline to create a dynamic, engaging shot.
Group Shots: For group photos, arrange the people in a V-shape to create depth, and use a wide aperture (e.g., f/4) to blur out the busy background. This keeps the focus on your subjects.

An infographic showcasing techniques for effective event photography, including arranging group shots in a V-shape for depth and using the rule of thirds by placing subjects along gridlines for dynamic and balanced composition.
4. Challenges Encountered and Solutions Provided
Before we wrap up, let’s address some of the most common challenges event photographers face—and how this guide helps you overcome them:
Unpredictable lighting conditions Use RAW for more flexibility in post-processing, adjust ISO dynamically, and use a fill flash or bounce flash to balance lighting.
Capturing fast-moving action without blur Utilize burst mode, maintain a shutter speed of at least 1/250s for moving subjects, and anticipate key moments.
Navigating large crowds while maintaining composition Use a 70-200mm lens to capture candid moments from a distance, position yourself strategically, and use foreground elements creatively to frame shots.
Dealing with dark venues without flashIncrease ISO, use a fast prime lens (e.g., f/1.8 or f/2.8), and stabilize your shots with a monopod to reduce motion blur.
Ensuring strong composition under pressure Apply the rule of thirds, keep backgrounds clean, and use leading lines to guide attention to your subject.
By implementing these solutions, you’ll be able to handle almost any challenge thrown your way during an event shoot!

Solutions to common photography challenges, including handling unpredictable lighting by using RAW format, adjusting ISO, and using fill or bounce flash; capturing fast-moving action with burst mode and fast shutter speeds; managing crowded environments with a 70-200mm lens and strategic positioning; and shooting in dark venues by increasing ISO and using fast prime lenses
5. Post-Processing Tips
After the event, your work isn’t done yet. Post-processing can take your photos from good to great.
Organize your RAW files: Sort your images by theme or moment, making the editing process more efficient.
White Balance Adjustments: Correct white balance in post if the venue’s lighting was tricky. This helps keep skin tones accurate and avoids unnatural color casts.
Sharpening and Noise Reduction: Apply selective sharpening to enhance details while using noise reduction tools to minimize grain, especially in low-light shots.

Outlining a post-processing photography workflow, including organizing RAW files by theme for efficient editing, sharpening and reducing noise to enhance details and minimize grain, and adjusting white balance to correct lighting issues and maintain color accuracy
6. Q&A: Practical Tips
Q: How do I handle backlit subjects?
A: Use spot metering on the subject’s face and add a fill flash to balance exposure. This ensures that your subject is properly lit, even against a bright background.
Q: What settings work for dark venues without flash?
A: Increase your ISO (3200-6400), use a fast f/1.8 or f/2.8 prime lens, and stabilize with a monopod or tripod to avoid motion blur.
7. Conclusion
Event photography isn’t just about capturing images—it’s about telling a story. Whether it’s the laughter at a wedding, the intensity of a business speech, or the joy of a family reunion, your photos should preserve these moments in their most authentic form.
Now that you have the knowledge and techniques to master event photography, it’s time to put them into action!
📸 Want to take your event photography to the next level?
Follow me on Instagram @messai_photography for behind-the-scenes tips and inspiration.
Need professional event photography in Beijing? Book a session with Messai Photography today!
Don’t miss out on exclusive photography guides—subscribe to my newsletter for expert tips straight to your inbox!
Let’s capture unforgettable moments together! 🚀
How to Become an Event Photographer: A Fun, No-BS Guide
Want to turn your camera into a career? Event photography is fast, unpredictable, and insanely rewarding. This no-BS guide covers everything—from must-have gear to landing clients—so you can start shooting and start earning. Ready? Let’s do this!
Ever dreamed of turning your love for photography into a career that lets you capture life’s most unforgettable moments? Whether it’s the joy of a wedding, the energy of a concert, or the elegance of a corporate gala, event photography is your ticket to a career that’s as thrilling as it is rewarding. But here’s the thing: it’s not just about having a fancy camera. It’s about storytelling, hustle, and a whole lot of heart.
Ready to dive in? This guide will walk you through everything you need to know—from nailing your first shot to building a business that thrives. So grab your camera (or your phone for now), and let’s turn your passion into a paycheck. Keep reading—your future clients are waiting! 📸✨
Key Takeaways
✅ Event photography is a mix of art, hustle, and heart. You’ll need tech skills and people skills.
✅ Gear matters, but so does creativity. Invest wisely, but don’t stress over having the "perfect" setup.
✅ Your portfolio is your superpower. Start small, dream big, and let your work speak for itself.
✅ Marketing isn’t scary. Be authentic, share your passion, and the clients will come.
✅ Never stop learning. Trends change, but curiosity keeps you ahead.
Table of Contents
So, What’s Event Photography Really Like?
What Does an Event Photographer Do?
Skills You’ll Need (Besides Loving Cameras)
Gear Up Without Going Broke
Building a Portfolio That Gets You Hired
Finding Clients (Without Being Sleazy)
Pricing: Don’t Sell Yourself Short
Certifications? Meh… But Here’s the Tea
Common Challenges (and How to Crush Them)
Q&A: Let’s Get Real
Ready to Dive In?
1. So, What’s Event Photography Really Like?
Imagine being the person who freezes time—capturing laughter at weddings, the energy of concerts, or the quiet pride in a corporate award ceremony. Event photography is storytelling in real-time. It’s fast, unpredictable, and wildly rewarding. You’re not just taking photos; you’re creating memories people will cherish forever. Cool, right?

This image highlights the diverse world of event photography, featuring three main types: wedding photography capturing emotional moments, concert photography showcasing the energy of live performances, and corporate event photography documenting professional achievements and milestones.
2. What Does an Event Photographer Actually Do?
You’re the ninja with a camera. One minute you’re snapping candid dance-floor chaos, the next you’re orchestrating a group shot of 50 people. You’ll juggle lighting challenges, soothe nervous brides, and maybe even climb a ladder for the perfect angle. Your job? Make every moment look effortless and unforgettable.
3. Skills You’ll Need (Besides Loving Cameras)
Let’s get real—this isn’t just about clicking a shutter.
Tech chops: Master manual mode like it’s your second language. Your shutter, aperture, and ISO should dance together effortlessly, no matter the scene. Bright noon sun? Moody candlelit dinner? You tweak settings like a pro—because guessing is for beginners.
People skills: You’ll charm toddlers, CEOs, and everyone in between. A nervous client? You ease them in. A stubborn group? You rally them with energy. Photography is half technical, half psychology—so smile often, listen more, and make people feel like rockstars.Adaptability: Rain at an outdoor wedding? Power outage mid-shoot? You pivot like a seasoned pro. A great photographer sees challenges as creative opportunities—using reflections from puddles or candlelight glow to make magic when plans fall apart..
Editing wizardry: Lightroom and Photoshop are your best friends, not strangers. You know how to enhance, not overdo—turning “meh” shots into masterpieces. Colors pop, skin glows, and distractions disappear, all while keeping things natural and timeless.

This infographic outlines the essential skills for event photographers, including editing expertise in software like Lightroom and Photoshop, technical proficiency with camera settings and lighting, adaptability to handle unexpected situations, and strong people skills to connect with diverse clients.
Pro tip: Practice shooting in weird lighting (like your dimly lit kitchen) to prepare for real-world chaos.
4. Gear Up Without Going Broke
You don’t need all the gadgets, but here’s the essentials:
Camera: A solid used DSLR or mirrorless camera (like a Canon EOS R or Sony A7III) is a great way to start without breaking the bank. No need for the latest model—what matters is learning how to use it well.
Lenses: A 24-70mm f/2.8 zoom lens is your all-in-one workhorse, handling everything from portraits to events. For dreamy background blur on a budget, grab a 50mm f/1.8—it’s small, sharp, and won’t hurt your wallet.
Flash: A speedlight (like a Godox) is a lifesaver when natural light isn’t on your side. Whether you’re indoors or shooting at night, a little extra light can make all the difference—just bounce it off a wall for a softer look.Extras: Spare batteries, extra memory cards, and a comfy camera bag will save you from headaches later. Running out of power or storage mid-shoot? Not fun. And trust me, your shoulders will appreciate a well-padded bag.
This infographic highlights the essential gear for event photographers, including a high-quality camera, versatile lenses, a reliable flash, and tools for noise reduction to ensure crisp and professional images in any setting.
Noise-reduction hack: Shoot in RAW. It’s like a “get out of jail free” card for editing.
5. Building a Portfolio That Gets You Hired
Start small, think big:
Volunteer: Offer to shoot your cousin’s birthday party or a local charity event—real people, real moments, real experience. Free gigs help build your portfolio, and who knows? A guest might hire you for a paid job next.
Assist a pro: Shadowing an experienced photographer (especially for weddings or events) is a fast track to learning. You’ll pick up tips, see how they handle pressure, and maybe even get some referrals down the road.Website magic: Use Squarespace or Format to create a sleek, professional portfolio. Keep it simple—your best 20 shots are way more impactful than 100 okay ones. First impressions matter, so make every image count. Show range: Mix candid moments, portraits, and detail shots. Make viewers feel like they were there.

This infographic outlines steps to build a strong photography portfolio, including gaining experience through volunteer opportunities, assisting professionals to learn and network, creating a website to showcase your best work, and displaying a diverse range of photography skills to attract clients.
6. Finding Clients (Without Being Sleazy)
Social media is your BFF:
Instagram: Share behind-the-scenes reels to give followers a glimpse of your creative process. Let your personality shine—people love working with photographers they feel connected to!
Facebook: oin local event and photography groups where potential clients hang out. Engage by commenting and offering helpful advice—genuine interactions work better than self-promotion.
LinkedIn: Build relationships with wedding planners, corporate organizers, and other industry professionals. A well-timed message or comment can lead to bookings and collaborations.
Network IRL:
Hand out business cards at bridal expos. Wedding expos are full of potential clients, so make sure they leave with your card. A quick chat and a memorable impression can turn into a booking later
Partner with florists or DJs—they’ll refer you to clients: Vendors work with the same clients you want to reach. Build relationships with florists, DJs, and planners—they’ll send referrals your way when couples need a photographer.
Website must-haves:
A clear “Hire Me” button. Make it easy for potential clients to book you. A bold, visible “Hire Me” or “Book a Session” button removes guesswork and boosts conversions.
Testimonials (even if it’s just your mom at first). Social proof builds trust. Start with kind words from friends, family, or early clients—real experiences help new clients feel confident in hiring you.

This infographic highlights strategies for building a strong client base, including leveraging social media engagement, forming strategic partnerships, implementing effective marketing strategies, optimizing your website for better visibility, and attending networking events to connect with potential clients.
7. Pricing: Don’t Sell Yourself Short
Hourly rates: Start at 75–150/hour if you’re new. Up to $300+/hour for pros.
Packages: Bundle hours + prints + albums. Example:
Silver Package: 4 hours, 200 edited photos ($800)
Gold Package: 8 hours, 500 photos, custom album ($1,500)
Secret sauce: Charge what you’re worth. Undercutting hurts everyone—including you.
8. Certifications? Meh… But Here’s the Tea
No one asks for a degree, but certifications build trust:
Certified Professional Photographer (CPP): t’s not just a fancy title—it shows dedication and can justify higher rates. Plus, the process itself pushes you to sharpen your skills.
Workshops: Hands-on learning is priceless. Whether it’s off-camera lighting, drone photography, or posing techniques, workshops help you level up and connect with other creatives.
Online courses: Platforms like CreativeLive or Skillshare are goldmines for learning at your own pace. From editing tricks to business strategies, but don’t overlook great photography blogs! Subscribe to ones that break down techniques, business tips, and editing tricks—like my blog at bejimessai.com for real-world advice tailored for photographers.
Remember: Your work speaks louder than a certificate, but credentials (and continuous learning) can give you that extra boost of confidence—to both you and your clients.
9. Common Challenges (and How to Crush Them)
“The lighting is TERRIBLE!”
Bounce your flash off ceilings: Aim your flash at a white ceiling or wall to create soft, natural-looking light. Direct flash is harsh—bouncing it makes all the difference.
Crank up ISO (noise can be fixed later): A sharp, well-lit photo with some noise is better than a dark, blurry one. Modern editing tools handle noise like a charm!
“Clients are being picky!”
Set expectations upfront with a sample gallery or mood board. Clear communication avoids surprises and endless revisions.
“I’m burnt out!”
Burnout kills creativity, so block time to recharge. Even ninjas need naps to stay sharp!
10. Q&A: Let’s Get Real
Q: Do I need a photography degree?
A: Nope! Clients care about your work, not your diploma. A strong portfolio, YouTube tutorials, and hands-on practice will get you further than a degree—without the student loans
Q: How do I NOT mess up an Event or a wedding?
A: Backup gear. Weddings are one-shot events—no do-overs. Have extra cameras, lenses, batteries, and memory cards. And always shoot in RAW so you can fix unexpected lighting issues later.
Q: What if I’m introverted?
A: Fake it ’til you make it. A warm smile and a few good questions can break the ice. Let your camera be your confidence shield—your work will do most of the talking
11. Ready to Dive In?
Event photography isn’t just a job—it’s a front-row seat to life’s best moments. You’ll work hard, laugh harder, and occasionally eat lukewarm buffet food. But when a client tears up seeing their photos? That’s the magic.
Your first step? Grab your camera, shoot anything, and hashtag the heck out of it. The world needs your unique eye. Now go make some memories! 📸✨
For more tips on capturing events, check out my blog: What Is Event Photography? Documenting Emotions & Moments.
What Is Event Photography? Documenting Emotions & Moments
Event photography is the art of documenting gatherings and capturing spontaneous interactions and emotions that define an event. Whether it’s a corporate function, trade show, or wedding, a skilled event photographer ensures your special moments are preserved.
Quote: "You’re walking around being a documentarian." – Andrew Bennett
Event photography is the art of documenting gatherings and capturing spontaneous interactions and emotions that define an event. Whether it’s a corporate function, trade show, or wedding, a skilled event photographer ensures your special moments are preserved.
Event photography is more than just taking pictures; it's about capturing emotions, interactions, and key moments that tell a compelling story. Whether you're organizing a corporate event, festival, or charity gala, high-quality photos can preserve memories, boost engagement, and attract sponsors.
As a professional event photographer, I understand the significance of every moment. From the first guest's arrival to the final applause, each detail plays a role in shaping the event's narrative. I’m here not just to capture images but to document the energy, atmosphere, and essence of your occasion. Let’s explore why event photography is an essential part of any successful event.
Key Takeaways
Event photography captures emotions and boosts event engagement.
A professional event photographer offers stress-free, high-quality results.
Hiring the right event photographer requires research, budgeting, and clear contracts.
Different event types require specialized photography approaches.
Table of Contents
What is Event Photography?
Why Event Photography Matters
Benefits of Hiring a Professional Event Photographer
How to Hire the Best Event Photographer
Types of Event Photographers
Challenges in event photography and how a professional event photographer overcomes them
Q&A: Common Event Photography Questions
Conclusion: Elevate Your Event with Professional Event Photography
What is Event Photography?
Event photography is the art of capturing live gatherings, from corporate conferences to weddings, by documenting spontaneous interactions, emotions, and key moments. But what is event photography at its core? It’s more than snapping photos—it’s about crafting a visual narrative that immortalizes the energy, atmosphere, and story of your occasion. A skilled event photographer blends technical expertise with creativity to deliver images that resonate long after the event ends.
Why Event Photography Matters
Event photography transforms fleeting moments into lasting memories. Whether it’s a speaker’s powerful address, a guest’s genuine laugh, or a sponsor’s branded display, professional photos ensure these details aren’t forgotten. Here’s why hiring an event photographer is non-negotiable:
Preserve Key Moments: Event photography freezes time, letting you revisit speeches, celebrations, and connections.
Boost Engagement: High-quality images from your event photographer fuel social media buzz, extending your event’s reach.
Attract Sponsors: Sponsors demand polished visuals to validate their investment—event photography delivers exactly that.
Drive Future Attendance: Dynamic photos from a professional event photographer showcase your event’s success, enticing newcomers.

Infographic on the importance of event photography, highlighting capturing memories, boosting event attendance, attracting sponsors, and enhancing social media engagement with professional, high-quality images.
Benefits of Hiring a Professional Event Photographer
Wondering what is event photography’s ROI (Return On Investment)? A skilled event photographer provides:
Stress-Free Coverage: Focus on hosting while your event photographer captures every moment.
Creative Expertise: From low-light mastery to candid shots, event photography elevates your brand’s visual identity.
Consistent Quality: Advanced gear and editing ensure your event photographer delivers crisp, vibrant images.
How to Hire the Best Event Photographer
Define Your Needs: Clarify your event photography goals. Start by identifying the type of event, its duration, and the specific photography deliverables you need. Consider whether you require candid coverage, posed shots, or specific branding elements in your images.
Set a Budget: Allocate funds for an event photographer whose portfolio aligns with your vision Allocate funds early to ensure you can hire a professional event photographer who meets your quality expectations. A well-planned budget helps you balance costs with the level of service required.
Research & Shortlist: Seek event photographers experienced in your event type (e.g., galas, trade shows). Review their portfolios, read client testimonials, and check their style and consistency to ensure they align with your vision.
Interview Candidates: Discuss your selected event photography experience, approach to event coverage, and contingency plans for unforeseen issues. Clarify image rights, turnaround times, and any additional services they offer.
Review Contracts: Carefully check with your event photographer the contract terms, including pricing, overtime rates, and copyright ownership. Ensure all deliverables, deadlines, and usage rights are clearly outlined before signing.
Post-Event Follow-Up: After the event, confirm with your event photographer the expected timeline for receiving images. Review the final selection, request necessary edits, and provide feedback to ensure satisfaction with the final results.
Types of Event Photographers
Corporate Event Photography: Corporate events such as meetings, conferences, and networking sessions require a professional approach to capture key moments with clarity and precision. High-quality images document important speeches, panel discussions, and interactions, creating a valuable visual record for internal use, PR, and marketing. Well-composed corporate event photos can enhance brand credibility and showcase a company’s industry presence.
Festival & Concert Photography: Festivals and concerts are dynamic environments filled with energy, movement, and vibrant expressions. Capturing the excitement of the crowd, the intensity of live performances, and behind-the-scenes moments helps to preserve the unique atmosphere of the event. These images not only serve as lasting memories but also play a crucial role in future promotions and sponsorship opportunities.
Trade Show & Product Launch Photography: Trade shows and product launches are designed to make an impact, and professional photography ensures that brand interactions and product presentations are documented in the best light. Capturing engaging booth displays, networking moments, and product unveilings helps businesses showcase their innovations to a wider audience. High-quality images from these events are essential for marketing materials, press releases, and social media engagement.
Charity & Gala Photography: Charity events and gala evenings are about more than just elegance—they highlight meaningful causes, donor engagement, and heartfelt moments. Capturing key elements such as auctions, speeches, and candid interactions helps organizations tell their story and inspire continued support. Professional photography provides valuable content for fundraising campaigns, sponsor appreciation, and future event promotion.
Art Exhibition Photography: Art exhibitions require a delicate balance of lighting, composition, and perspective to accurately represent the artwork on display. High-quality images capture not only the details of the pieces but also the emotions and reactions of visitors interacting with the art. These photographs serve as important records for artists, galleries, and museums, helping to extend the reach of an exhibition beyond its physical space.

Infographics highlighting event photography types, including corporate, festival, trade show, charity, and art exhibition, focusing on key moments such as meetings, performances, and brand engagement. Ideal for capturing professional event moments.
Challenges in Event Photography (and How Professionals Overcome Them)
Even the most skilled event photographer faces hurdles in event photography. Understanding these challenges—and how professionals overcome them—ensures your event’s visuals stay flawless.
Low-Light Venues
Challenge: Dimly lit spaces (e.g., galas, concerts) can lead to grainy or blurry shots.
Solution: A professional event photographer uses fast lenses (f/1.8 or f/2.8) and external flashes to balance ambient light without disrupting the mood.Unpredictable Crowds
Challenge: Dynamic events like festivals make framing clean shots difficult.
Solution: Seasoned event photographers anticipate movement, use zoom lenses, and position themselves strategically to capture key moments.Capturing Candid Emotions
Challenge: Forced smiles ruin authenticity—event photography thrives on spontaneity.
Solution: Pros blend into the background, shoot with long lenses, and observe interactions to document genuine laughter and reactions.Equipment Limitations
Challenge: Bulky gear can hinder mobility during fast-paced event photography.
Solution: Top event photographers carry lightweight, dual-camera setups with versatile lenses (24-70mm, 70-200mm) for quick adjustments.Time Constraints
Challenge: Tight schedules limit opportunities to reshoot missed moments.
Solution: An experienced event photographer creates a shot list, scouts venues early, and collaborates with organizers to prioritize critical scenes.Balancing Creativity & Client Demands
Challenge: Clients often want both artistic shots and comprehensive coverage—what is event photography’s role here?
Solution: Clear pre-event communication ensures the event photographer understands brand guidelines, VIPs, and must-have moments while retaining creative freedom.Post-Processing Workload
Challenge: Editing thousands of images post-event is time-intensive.
Solution: Pros use batch-editing tools and AI software to streamline color correction, ensuring faster delivery without sacrificing quality.
By partnering with a seasoned event photographer, you mitigate these challenges and guarantee exceptional event photography results.
Q&A: Common Event Photography Questions
How many photos will my event photographer deliver?
The number of images you receive from an event photographer varies based on the event’s duration, size, and overall style. On average, a professional photographer delivers anywhere from 50 to 100 high-quality images per hour. This range ensures a balance between capturing essential moments and maintaining artistic consistency. Factors such as the type of event, level of activity, and client preferences also influence the final image count. Clear communication with your photographer can help set realistic expectations for the number of photos you’ll receive.
What is event photography’s role in marketing?
Discuss image rights in your contract to ensure you can use photos for promotional purposes. Clearly defining usage rights with your event photographer helps avoid misunderstandings and ensures you have the necessary permissions to showcase your event effectively. Whether for social media, marketing materials, or press releases, having a clear agreement in place guarantees you can maximize the impact of your event photography while respecting the event photographer’s creative ownership.
What’s the best way to find an event photographer in Beijing?
Finding an experienced event photographer in Beijing starts with thorough research. Explore online directories, WeChat groups, and platforms like Xiaohongshu and Dianping to discover professionals with strong local reputations. Many event photographers showcase their portfolios on Instagram, WeChat, or dedicated websites, giving you insight into their style and expertise. Additionally, word-of-mouth recommendations from expats or business communities can help identify reliable professionals. Taking the time to vet potential event photographers ensures you select the right fit for your event’s needs.
What should I look for in an event photographer’s portfolio?
When choosing an event photographer, look for consistency in quality, experience with similar events, and a style that aligns with your vision. A strong portfolio should demonstrate a keen eye for detail, an ability to capture key moments, and adaptability in various lighting and venue conditions. Reviewing past work and client feedback can help you gauge whether their approach meets your expectations. Open communication about your goals and preferences ensures the final images reflect your event’s unique atmosphere and purpose.
How long does it take to receive event photos?
Delivery times vary depending on the event photographer’s workload, the complexity of editing, and the event’s scale. Most professional event photographers provide high-quality edited images within 1-3 weeks. Some offer expedited processing for an additional fee, while others may take longer for large-scale events requiring extensive retouching. Discussing timelines upfront with your event photographer ensures you have clear expectations on when to receive your final images.
Do event photographers provide edited images?
Most professional event photographers include basic edits as part of their package. These typically cover color correction, cropping, and exposure adjustments to enhance the overall quality of the images. Some event photographers may also offer more advanced retouching services, such as background clean-up or skin retouching, for an additional fee. Clarifying the extent of editing included in your package ensures you receive images that align with your expectations and the event’s branding.
Should I provide a shot list to the event photographer?
While professional event photographers are skilled at capturing spontaneous moments, it’s always helpful to provide a list of key moments or must-have shots. This ensures that important highlights, such as speeches, award presentations, or key interactions, are documented. However, experienced event photographers also anticipate and capture candid emotions and dynamic interactions that bring your event to life. Communicating your priorities while allowing creative flexibility results in a balanced and comprehensive visual story of your event.
What should I communicate with my photographer before the event?
To ensure smooth coverage, discuss event details, key moments, shot preferences, and the overall timeline with your event photographer. Clear communication about the schedule, lighting conditions, and any specific requirements—such as VIP guests or branded content—helps event photographers prepare adequately. Providing a run-of-show or itinerary allows them to anticipate crucial moments and position themselves accordingly, ensuring no key shot is missed.
How do event photographers handle low-light event conditions?
Professional event photographers use high-quality cameras, fast lenses, and external lighting to capture clear images in challenging conditions. Advanced camera sensors and prime or zoom lenses with wide apertures help achieve sharp, well-exposed shots, even in dimly lit venues. External flashes, continuous lights, or reflectors further enhance image quality by controlling shadows and highlights. These tools, combined with technical expertise, ensure that every moment is documented with clarity and professionalism, regardless of the environment.
Conclusion: Elevate Your Event with Professional Photography
Conclusion: Elevate Your Event with Professional Event Photography
Event photography isn’t just about photos—it’s about crafting a legacy. At Messai Photography, we redefine what is event photography by blending technical mastery with storytelling passion. As a seasoned event photographer, I bring:
Years of Expertise: From corporate galas to festivals, my tailored approach ensures no moment goes unnoticed.
Cutting-Edge Technology: High-end gear and AI-driven editing deliver crisp, vibrant images, even in challenging venues.
Stress-Free Partnership: Clear communication, fast turnaround, and full usage rights let you focus on hosting while I handle the rest.
Don’t settle for generic shots. Choose a dedicated event photographer who treats your event as uniquely as you do. Messai Photography guarantees event photography that immortalizes your occasion’s energy, emotion, and impact.
📅 Book a Consultation Today
Let’s discuss how to create a visual narrative that aligns with your event’s vision.
💬 Have thoughts or questions about event photography? Leave a comment below—I’d love to hear from you!
Master Portrait Photography Color Grading Techniques
Have you ever wondered why some portraits feel alive with emotion while others fall flat? The secret often lies in color grading—the creative process of adjusting colors to enhance mood, style, and storytelling. Whether you're a beginner or an enthusiast, mastering color grading can transform your portrait photography from ordinary to extraordinary. In this guide, you’ll learn step-by-step techniques like split toning, selective color adjustments, and using LUTs to create stunning results. Plus, discover the best tools for the job, avoid common mistakes, and explore real-life case studies to inspire your work. Ready to elevate your portraits? Let’s dive in!
Have you ever wondered why some portraits feel alive with emotion while others fall flat? The secret often lies in color grading—the creative process of adjusting colors to enhance mood, style, and storytelling. Whether you're aiming for a warm, inviting vibe or a cool, moody atmosphere, color grading lets you tell a story through colors. It’s the magic touch that transforms a good photo into a stunning masterpiece.
In this guide, we’ll walk you through everything you need to know about color grading for portrait photography. From essential tools to step-by-step techniques, you’ll learn how to create portraits that stand out and reflect your unique style. By the end, you’ll have the skills to elevate your work and develop a signature look that sets your portraits apart.
Key Takeaways
Understand how color grading transforms portraits by enhancing mood and emotion.
Learn step-by-step techniques like split toning, selective color adjustments, and using LUTs.
Discover the best tools for color grading, including free and affordable options.
Explore the advantages of using presets and how to create or find them.
Avoid common mistakes and learn how to fix them like a pro.
Dive into detailed case studies to find your unique style.
Table of Contents
Introduction: Why Color Grading Matters in Portrait Photography
What is Color Grading? (And How It’s Different from Color Correction)
Essential Tools for Color Grading: Photoshop, Lightroom, Capture One, and Free Alternatives
Popular Color Grading Techniques and tools
Split Toning: Create Depth and Emotion
Selective Color Adjustments: Perfect Skin Tones and Backgrounds
Curves and Levels: Master Contrast and Color Balance
Using LUTs for Consistency and Style
Using Presets for Efficiency and Style
Case Studies: Real-Life Examples of Color Grading
Vintage Style: Warm Tones and Faded Shadows
Modern Look: Clean and Vibrant Skin Tones
Cinematic Mood: Cool Shadows and Warm Highlights
Common Mistakes to Avoid (And How to Fix Them)
Frequently Asked Questions (FAQs)
Conclusion: Find Your Style and Share Your Work
Introduction: Why Color Grading Matters in Portrait Photography
Color grading is more than just a technical step in photo editing—it’s a powerful tool for storytelling. It allows you to evoke emotions, set the mood, and create a cohesive aesthetic in your portraits. Think of it as the final brushstroke on a painting, the detail that ties everything together. Whether you’re enhancing the warmth of a golden-hour portrait or adding a cool, cinematic tone to a moody shot, color grading helps you communicate your vision.
For beginners, color grading might seem intimidating, but it’s a skill that anyone can learn with practice. By understanding the basics and experimenting with different techniques, you can take your portrait photography to the next level. Let’s start by clarifying what color grading is and how it differs from color correction.
What is Color Grading? (And How It’s Different from Color Correction)
Before diving into techniques, it’s important to understand the difference between color grading and color correction. Color correction is the process of fixing technical issues in a photo, such as exposure, white balance, and color casts. It’s like straightening a crooked picture frame—it ensures the image looks accurate and balanced. For example, if a portrait has overly orange skin tones due to poor lighting, the color correction would adjust the hues to make the skin look natural.
Color grading, on the other hand, is about creativity. It’s the process of enhancing or altering colors to achieve a specific artistic look. While color correction ensures the photo is technically sound, color grading adds personality and style. For instance, you might add a warm glow to the skin and cool tones to the background to create a cinematic effect. Think of color grading as the final polish that brings your artistic vision to life.

Portrait Color Correction is when an image suffers a technical issue related to colors and fixing turning the entire image into a technically sound image. Color Grading is an artistic look achieved through color enhancement or color altering.
Essential Tools for Color Grading
To get started with color grading, you’ll need the right tools. The software you choose will depend on your skill level, budget, and specific needs. Here’s a breakdown of the most popular options:
Adobe Lightroom is a favorite among photographers for its user-friendly interface and powerful editing capabilities. It’s ideal for global adjustments, batch editing, and applying presets. Lightroom is perfect for beginners who want to achieve professional results without the steep learning curve of more advanced software.
Adobe Photoshop offers unparalleled control for advanced color manipulation and detailed retouching. With tools like Curves, Selective Color, and Gradient Maps, Photoshop allows you to fine-tune every aspect of your image. It’s a great choice for photographers who want to take their editing skills to the next level.
Capture One is known for its exceptional color grading tools and precision. It’s particularly popular among professional photographers who need advanced features and tethering capabilities. While it has a steeper learning curve, the results are worth the effort.
If you’re looking for free or affordable alternatives, there are plenty of options to explore. Snapseed is a powerful mobile app that’s perfect for quick edits on the go. Darktable is an open-source alternative to Lightroom, offering robust editing tools for desktop users. VSCO is another great option for applying stylish presets and achieving a cohesive look across your photos.

The Basic Differences Between The Most Important Portrait Photography Professional and Beginner Photographers.
Popular Color Grading Techniques
Now that you have the right tools, let’s dive into the most important color grading techniques. These methods will help you create depth, enhance skin tones, and achieve a consistent style across your portraits.
Split Toning: Create Depth and Emotion
Split toning is a technique that adds different colors to the highlights and shadows of your image. This creates a sense of depth and emotion, making your portraits more dynamic. To apply split toning, open your photo in Lightroom or Photoshop. In Lightroom, go to the Split Toning panel and add a warm tone (like orange) to the highlights and a cool tone (like blue) to the shadows. Adjust the balance slider to fine-tune the effect. A pro tip is to use split toning to create a cinematic look by pairing warm highlights with cool shadows.
Selective Color Adjustments: Perfect Skin Tones and Backgrounds
Selective color adjustments allow you to tweak specific colors without affecting the entire image. This is particularly useful for enhancing skin tones or refining the background. In Lightroom, use the HSL (Hue, Saturation, Luminance) sliders to adjust the red and orange hues for natural-looking skin. In Photoshop, the Selective Color tool gives you even more control. Always zoom in to check skin tones and ensure they look natural under different lighting conditions.
Curves and Levels: Master Contrast and Color Balance
Curves and Levels are powerful tools for controlling contrast and color balance. In Photoshop, open the Curves or Levels adjustment layer and adjust the RGB curve to fine-tune contrast. You can also use the individual color channels (Red, Green, Blue) to balance colors. A pro tip is to create an S-curve for added contrast and depth, which can make your portraits pop.
Using LUTs for Consistency and Style
LUTs (Look-Up Tables) are pre-made color profiles that you can apply to your photos for consistent results. They’re especially useful for maintaining a cohesive style across a series of portraits. To use LUTs, download or create a profile that matches your desired style, then apply it in Lightroom, Photoshop, or Capture One. Adjust the intensity to suit your image, and don’t be afraid to customize the LUT for a unique look.
Using Presets for Efficiency and Style
While LUTs are fantastic for video and advanced color grading, presets are the go-to tool for photographers looking to streamline their workflow and maintain a consistent style. Presets are essentially pre-configured settings that you can apply to your photos with a single click. They’re available in most editing software, including Lightroom, Capture One, and even mobile apps like VSCO.
Advantages of Using Presets
Save Time: Presets allow you to apply complex edits in seconds, making them ideal for batch editing or working on large projects.
Consistency: Just like LUTs, presets help you maintain a consistent look across all your images, which is crucial for building a recognizable style.
Experimentation: Presets are a great way to experiment with different looks. You can apply a preset as a starting point and then tweak the settings to suit your image.
Learning Tool: By analyzing how presets are built, you can learn more about color grading and develop your editing skills.
How to Build Your Own PresetsCreating your own presets is easier than you might think. Here’s how to do it in Lightroom:
Edit a photo to your liking, adjusting settings like exposure, contrast, white balance, and split toning.
Once you’re happy with the result, go to the Develop module and click on the “+” icon next to the Presets panel.
Name your preset and choose which settings to include (e.g., basic adjustments, tone curve, split toning).
Click Create, and your preset will be saved for future use.
You can also create presets in Photoshop using Actions or in Capture One using Styles. The process is similar—edit a photo, save the settings, and apply them to other images.
Where to Get PresetsIf you’re not ready to create your own presets, there are plenty of resources where you can find high-quality options:
Marketplaces: Websites like Creative Market, Etsy, and Envato Elements offer a wide range of presets for different styles and genres.
Photography Communities: Many photographers share free or paid presets on platforms like Instagram, YouTube, or their blogs.
Software Libraries: Lightroom and Capture One come with built-in presets that you can use as a starting point.
When choosing presets, look for ones that align with your style and the type of portraits you shoot. For example, if you specialize in warm, natural tones, avoid presets that are overly cool or dramatic. And remember, presets are meant to be customized—don’t be afraid to tweak them to suit your specific needs.
Case Studies: Real-Life Examples of Color Grading
To help you see these techniques in action, let’s explore a few real-life examples of color grading in portrait photography.
Case Study 1: Vintage Style
The goal is to create a warm, nostalgic look. The techniques used included split toning with warm highlights and faded shadows, reduced saturation, and added grain. The result is a portrait that feels timeless and full of character.
Case Study 2: Modern Look
For this look, the aim is to achieve clean, vibrant skin tones with a polished background. Selective color adjustments should be used to enhance the skin, while curves and levels add contrast and sharpness. The final image is crisp, modern, and full of life.
Case Study 3: Cinematic Mood
The aim is to evoke a dramatic, film-like atmosphere. Cool shadows, warm highlights, and desaturated mid-tones should be used to create a moody, cinematic effect. The result will be a portrait that feels like a still from a movie.

Common Mistakes to Avoid (And How to Fix Them)
Even experienced photographers can make mistakes when color grading. Here are some common pitfalls and how to avoid them:
Over-Saturating Colors
Problem: Over-saturation can make skin tones look unnatural and distract from the overall image.
Fix: Use the HSL sliders to reduce saturation in specific colors, especially reds and oranges.
Ignoring Skin Tones
Problem: Skin tones can look too orange, red, or washed out if not properly adjusted.
Fix: Focus on red and orange hues in the HSL panel, and always check skin tones under different lighting conditions.
Inconsistent Grading Across a Series
Problem: Portraits from the same shoot can look mismatched if the color grading isn’t consistent.
Fix: Use presets or LUTs to maintain a cohesive style across all images.
Over-Reliance on Presets
Problem: Presets can make photos look generic if not customized.
Fix: Always tweak presets to suit each image and add your personal touch.
Frequently Asked Questions (FAQs)
Q: What’s the best software for beginners?
A: Start with Lightroom for its user-friendly interface and powerful tools. It’s perfect for learning the basics of color grading.
Q: How do I maintain natural skin tones?
A: Use selective color adjustments and always check skin tones under different lighting conditions. Focus on red and orange hues in the HSL panel.
Q: Can I use free tools for professional results?
A: Yes! Tools like Snapseed and Darktable offer great features for beginners and can produce professional-quality results.
Q: How do I match colors across multiple portraits?
A: Use LUTs or create a custom preset to apply to all images. This ensures a consistent style across your series.
Conclusion: Find Your Style and Share Your Work
Color grading is more than just a technical skill—it’s a way to express your creativity and bring your portraits to life. By experimenting with the techniques we’ve covered, you can develop a unique style that sets your work apart. Don’t be afraid to try new things and push your creative boundaries.
Portrait Photography: The Right Gears Selection
Embark on your portrait photography journey with confidence! Whether you're a budding enthusiast or a complete beginner, mastering the essentials—camera, lens, and lighting—can set the stage for stunning portraits. You don’t need the most expensive gear to create magic; with the right tools and techniques, your creativity can shine. Explore beginner-friendly cameras and lenses, dive into the nuances of natural and studio lighting, and discover how to bring depth and emotion to your shots. Let’s capture the stories that matter, one frame at a time
Starting your journey into portrait photography is exciting, but the sheer number of gear options can be overwhelming. Choosing the right camera, lens, and lighting is essential, but don’t worry—you don’t need the most expensive equipment to create stunning portraits. This guide is here to help you make informed decisions while keeping things simple for beginners.
1. Choosing Your Camera: Start with the Right Foundation
When it comes to portrait photography, your camera serves as the foundation for your art. While there are plenty of options, Canon cameras stand out for their reliability, user-friendly features, and extensive lens ecosystem—perfect for beginners.
DSLR vs. Mirrorless: What’s Best for Beginners?
DSLRs: These are tried-and-true tools, offering excellent image quality and affordability. Models like the Canon EOS 90D are great for beginners who prefer a traditional design with optical viewfinders.
Mirrorless Cameras: Lightweight and packed with modern features, mirrorless cameras are the future of photography. Canon’s EOS R series, such as the EOS R50, is compact, beginner-friendly, and offers cutting-edge technology like superior autofocus and real-time subject tracking.
Canon Recommendations for Beginners
Canon EOS R50: A perfect mirrorless option for beginners. It’s lightweight, offers excellent image quality, and features Canon’s intuitive interface.
Canon EOS 90D: A DSLR with a great balance of features and affordability, ideal for beginners looking to explore portrait photography.
Canon EOS Rebel T8i (850D): An entry-level DSLR that’s affordable, easy to use, and great for learning manual controls.
2. Selecting the Best Lens for Portraits: Your Most Important Tool
Your lens choice is arguably more important than your camera. The right lens will define the style and quality of your portraits. As a Canon user, you have access to an incredible lineup of lenses designed to meet all your creative needs.
Why Focal Length Matters in Portraits
Focal length plays a significant role in how your subject appears. Here’s a quick breakdown:
50mm (“Nifty Fifty”): A versatile lens for natural-looking portraits. It mimics what the human eye sees, making it great for full-body and half-body shots.
85mm: Known as the classic portrait focal length, this lens flatters facial features and creates creamy background blur (bokeh).
135mm and Above: Ideal for tightly framed headshots and maximum subject isolation.
Aperture and Bokeh: The Key to Stunning Portraits
Look for lenses with a wide aperture (f/1.2, f/1.4, or f/1.8). These allow more light into the camera and create that dreamy blurred background effect.
Wide apertures also help in low-light situations, making them great for both indoor and outdoor portraits.
Canon Lens Recommendations
Canon RF 50mm f/1.8 STM: Affordable, lightweight, and versatile, this lens is perfect for beginners starting with portrait photography.
Canon RF 85mm f/2 Macro IS STM: A budget-friendly yet professional lens offering sharp details and built-in image stabilization.
Canon RF 24-70mm f/2.8L IS USM: If you’re looking for flexibility, this zoom lens covers a range of focal lengths perfect for various portrait styles.
3. Mastering Lighting: The Secret to Breathtaking Portraits
Lighting transforms your portraits, bringing depth, mood, and emotion to your images. Whether you use natural or artificial light, understanding the basics will help you create professional-looking results.
Natural Light: An Excellent Starting Point
Golden Hour: The hour after sunrise or before sunset provides soft, flattering light. Position your subject so the light hits them from the side for depth or from behind for a glowing effect.
Open Shade: Perfect for harsh midday sunlight. Place your subject under a tree, awning, or building shadow for even, diffused lighting.
Reflectors: A budget-friendly tool to bounce light back onto your subject’s face, filling in shadows.
Artificial Light: Taking Control of Your Scene
Start Simple: A single off-camera strobe or continuous LED light is enough to experiment with studio-style portraits.
Modifiers: Use softboxes or umbrellas to diffuse harsh light, creating a softer, more flattering effect.
Angles Matter: Side lighting creates dramatic shadows, while front lighting produces softer, even tones.
Recommended Lighting Gear for Beginners
Godox AD200 Pro: A portable and versatile strobe light perfect for beginner and intermediate photographers.
Neewer 660 LED Video Light: An affordable continuous light option for those starting with artificial lighting.
5-in-1 Reflector: A must-have for anyone using natural light.
4. Bringing It All Together: Tools, Techniques, and Creativity
Once you have your camera, lens, and lighting sorted, it’s time to experiment!
Practice using wide apertures to blur the background and make your subject stand out.
Experiment with lighting angles to add depth and emotion to your portraits.
Play with focal lengths to discover what works best for your style.
Final Thoughts
Portrait photography is more than just capturing faces—it’s about telling stories and evoking emotions. As you start your journey, remember that creativity and connection with your subject matter more than expensive gear. With the right Canon equipment and a basic understanding of lighting, you’re well on your way to creating stunning portraits.
If you’re ready to take your skills to the next level, explore my workshops or book a portrait session. Let’s bring light, shadow, and emotion to life in every frame.
For more tips and inspiration, follow me on Instagram at@messai_photography or reach out at messai.photography@gmail.com.
Portrait Photography Basics: Various Types and Techniques.
At its core, portrait photography is the art of capturing a person or group of people, focusing on their expression, personality, and emotion.
Portrait photography is one of the most timeless and versatile genres, capturing the essence of individuals through carefully crafted images. But what are the types of portrait photography, and how do they differ in style and purpose? From traditional headshots to surreal conceptual art, this guide breaks down the various types of portrait photography and the techniques that make them unique
1. What is Portrait Photography
At its core, portrait photography is the art of capturing a person or group of people, focusing on their expression, personality, and emotion. It goes beyond just taking a picture of someone—it’s about telling their story through a single frame.
Key Elements of a Great Portrait
Subject: The person or people being photographed.
Lighting: The play of light and shadow that highlights features and mood.
Composition: How the subject is framed, including pose, angles, and background.
Expression: Authentic emotions, from a subtle smile to dramatic intensity.
2. Why Explore different types of Portrait Photography
Understanding the different types of portrait photography helps you choose the right style for your needs, whether it’s a professional headshot, a candid family moment, or an artistic statement. Portrait photography serves many purposes, depending on the subject and context. Here are some common reasons people commission or take portraits:
Personal Memories: Capturing moments with loved ones, milestones, or personal growth.
Professional Use/ Professional Branding: Headshots for resumes, LinkedIn profiles, or actor/model portfolios.
Creative Expression: Exploring themes like identity, culture, or emotions through conceptual portraits.
Family Legacy: Timeless portraits to be passed down through generations.
3. Types of Portrait Photography
The types of portrait photography vary widely, each with distinct aesthetics and goals. Here are the most popular styles:
Traditional Portraits
Classic poses, often with the subject looking directly at the camera.
Focused on formal attire and neutral backgrounds.
Environmental Portraits
Captures the subject in their natural environment, like a chef in a kitchen or an artist in their studio.
The setting plays a role in telling their story.
Lifestyle Portraits
Candid and casual, these portraits capture people in everyday moments.
Perfect for showcasing relationships and personalities.
Conceptual Portraits
Creative and artistic, often involving props, costumes, or surreal elements.
Designed to evoke a mood or tell a specific story.
Fine Art Portraits
Painterly in style, focusing on lighting, textures, and emotional depth.
This is where my specialty lies—combining light, shadow, and emotion to create timeless images.
4. What Makes Portrait Photography Unique?
1. Connection with the Subject
Unlike other photography genres, portrait photography requires building trust and rapport with the subject. A relaxed and comfortable subject results in authentic emotions.
2. Storytelling Through Details
Every detail in a portrait—from the lighting and pose to the choice of lens—works together to tell a story. A portrait isn’t just a face; it’s a glimpse into someone’s personality or life.
3. Timelessness
Portraits capture a moment in time, freezing emotions and memories for years to come. A great portrait never goes out of style.
5. Mastering Techniques for Different Types of Portrait Photography
Different types of portrait photography require different tools and approaches:
1. Camera and Lenses
A reliable Canon camera, like the EOS R8 or EOS 90D, will provide excellent quality.
Pair it with a prime lens like the RF 85mm f/1.8 or RF 50mm f/1.8 for sharp details and stunning background blur.
2. Lighting
Use natural light during Golden Hour for a warm and flattering glow.
Experiment with strobes and softboxes for dramatic studio portraits.
3. Composition and Posing
Follow the rule of thirds to position your subject off-center for more dynamic shots.
Guide your subjects to pose naturally by engaging them in conversation.
6. Why Different Types of Portrait Photography Matter
Choosing the right type of portrait photography ensures your images align with your vision. For instance, Portrait photography is more than just a photo; it’s an art form that celebrates people. Whether you’re capturing a fleeting smile or a reflective moment, portraits immortalize emotions and connections.
For me, portrait photography is about more than just technical skills—it’s about capturing the essence of a person and creating a piece of art that resonates.
7. FAQ: Types of Portrait Photography
Q: What are the most popular types of portrait photography?
A: Traditional, environmental, and lifestyle portraits are widely requested, but conceptual and fine art styles are growing for creative projects.
Q: How do I choose the best type of portrait photography for my needs?
A: Consider your goal—professional branding, personal memories, or artistic expression—and review examples of each type of portrait photography to decide.
Q: Can you combine multiple types of portrait photography in one session?
A: Absolutely! Many sessions blend traditional poses with candid lifestyle moments.
Conclusion: Create Timeless Portraits with the Right Style
Whether you’re drawn to the elegance of traditional portraits or the creativity of conceptual art, understanding the types of portrait photography ensures your images resonate deeply.
Ready to explore your options? As a specialist in fine art and conceptual types of portrait photography, I’ll help you craft images that tell your unique story.
Follow me on Instagram@messai_photography for more inspiration, or reach out to messai.photography@gmail.com for inquiries.
Understanding the Difference: Portraits vs. Headshots
Portraits and headshots may both capture your likeness, but they serve distinct purposes. Portraits dive into storytelling, emotions, and artistry, perfect for personal memories or creative projects. Headshots, on the other hand, are crafted for professionalism, showcasing your confidence and approachability for careers or branding.
Whether you need a portrait to tell your unique story or a polished headshot to make a strong impression, I’m here to help you shine. Ready to book your session? Visit www.bejimessai.com or follow me on Instagram @messai_photography for more inspiration!
In photography, the terms “portrait” and “headshot” are often used interchangeably. While both focus on capturing a person, they serve different purposes and have distinct styles. Understanding these differences will help you decide which type of photography suits your needs, whether for personal memories, professional branding, or artistic expression.
1. What Are Portraits?
Definition and Purpose
Portrait photography is a broad category designed to capture the essence of a person, focusing on their personality, emotions, and story. It goes beyond just showing what someone looks like—portraits aim to create a deeper connection between the viewer and the subject.
Key Features of Portraits
Creative Freedom: Portraits often involve artistic compositions, dramatic lighting, and unique backdrops.
Variety of Poses: Full-body shots, half-body shots, or close-ups can all fall under the portrait category.
Emotional Depth: Portraits are meant to evoke feelings or tell a story about the subject.
Multiple Contexts: From family portraits to fine art concepts, the possibilities are endless.
Examples of Portrait Photography
Lifestyle Portraits: Candid, casual images capturing people in their natural environments.
Fine Art Portraits: Painterly, dramatic, and heavily focused on light and shadow (like my painterly style!).
Environmental Portraits: Subjects are photographed in settings that tell a story about their lives or professions, such as a chef in a kitchen or a dancer in a studio.
2. What Are Headshots?
Definition and Purpose
Headshot photography focuses on capturing a professional, close-up image of a person, typically from the shoulders up. The goal is to present the subject in a polished and approachable manner, making it ideal for professional branding.
Key Features of Headshots
Tight Framing: The face is the focal point, usually photographed from the chest or shoulders upward.
Minimalist Approach: Simple backgrounds and natural lighting or soft artificial light are common.
Professional Expression: The subject’s expression should be confident and approachable, suitable for corporate, acting, or modeling profiles.
Consistency: This is especially important for corporate teams, where a uniform style is desired.
Examples of Headshot Photography
Corporate Headshots: For resumes, LinkedIn profiles, or company websites.
Actor/Model Headshots: Highlighting versatility and personality for casting directors or agencies.
Social Media Profiles: Professional yet personal images for platforms like Instagram or Facebook.
3. Key Differences Between Portraits and Headshots
Portraits
Purpose
Capturing artistic expressions for storytelling, personal use, or fine art.
Often used to highlight individuality, emotions, or cultural identity.
Frequently utilized in family albums, personal projects, or as gifts.
Framing
Includes a variety of compositions such as full-body, half-body, or close-up.
Allows flexibility depending on the story or mood being conveyed.
Expression
Showcases a wide range of emotions—joy, introspection, melancholy, or passion.
Encourages creativity, making it ideal for concepts and thematic storytelling.
Lighting
Combines natural light or artistic lighting setups to create mood and depth.
Can include dramatic chiaroscuro, soft diffused light, or vibrant backlighting.
Backgrounds
Offers diverse settings, such as urban streets, natural landscapes, or artistic backdrops.
Backgrounds often play a role in enhancing the narrative of the portrait.
Usage
Ideal for family keepsakes, art exhibitions, social media storytelling, or personal branding with a creative touch.
Headshots
Purpose
Primarily serves professional purposes like personal branding or corporate imagery.
Designed to showcase the subject’s professional image, reliability, and approachability.
Framing
A tight crop that includes just the head and shoulders.
Focuses solely on the subject’s face and upper torso.
Expression
Strives for confident, approachable, and professional expressions.
Emphasizes subtlety and balance—neither too intense nor too casual.
Lighting
Utilizes clean, even lighting to eliminate distracting shadows.
Studio setups often use softboxes or beauty dishes to achieve polished results.
Backgrounds
Maintains simplicity with neutral tones like white, grey, or light blue.
Backgrounds are intentionally non-distracting to keep the focus on the subject.
Usage
Commonly used for LinkedIn profiles, resumes, company websites, business cards, and acting or casting portfolios.
4. Which One Is Right for You?
Choosing between a portrait and a headshot depends on your goals:
Choose Portraits If:
You want to capture emotional depth or a story.
You’re celebrating milestones like graduations or family moments.
You’re interested in artistic or creative projects.
Choose Headshots If:
You need a professional image for work or auditions.
You want a polished look for LinkedIn or business websites.
Consistency is important for team branding.
5. My Approach to Portraits and Headshots
As a photographer specializing in painterly portraits and professional headshots, I understand the nuances of both styles.
Portrait Sessions: I aim to create timeless, emotion-filled images, blending light and shadow to reflect your unique personality.
Headshot Sessions: I focus on highlighting your best features with clean, professional compositions to help you stand out in your career.
Final Thoughts
Portraits and headshots are both powerful tools, but they serve different purposes. Whether you’re looking to tell a personal story or create a professional impression, understanding the difference will help you achieve your goals.
Ready to book a session? Let’s capture you at your best—whether it’s for your next artistic portrait or a professional headshot.
Follow me on Instagram at@messai_photography for inspiration, or contact me at messai.photography@gmail.com to book your session today.